Getting started: How to Learn Embedded Rust for Beginners
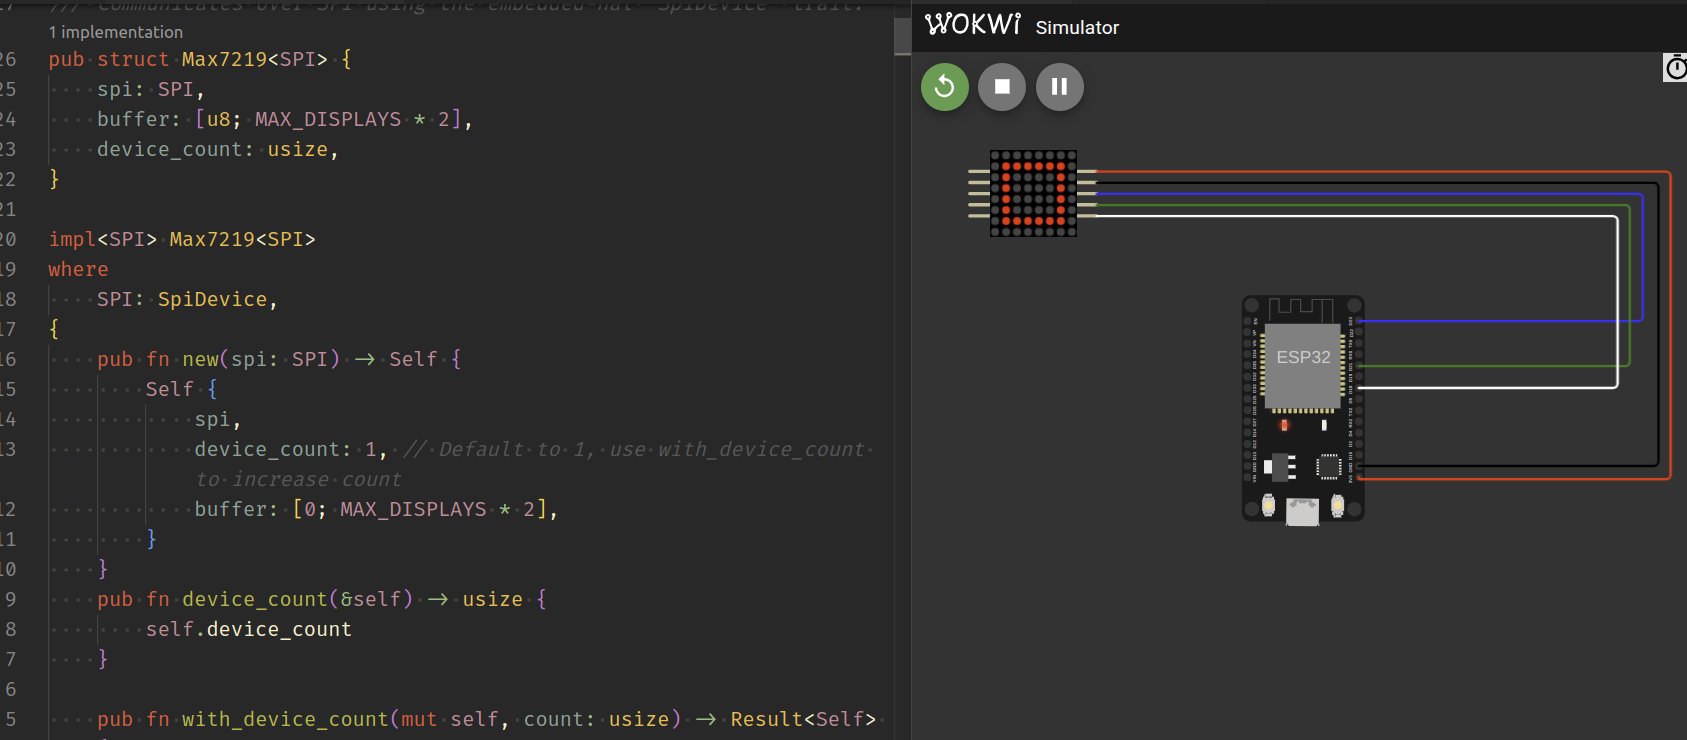
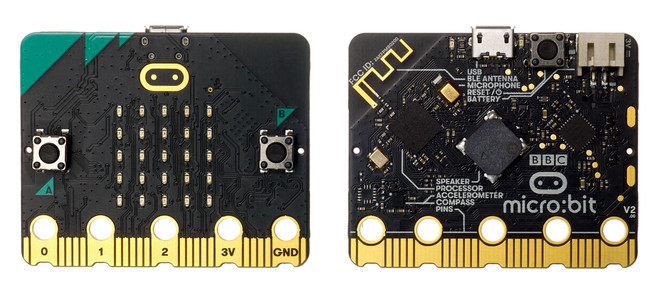
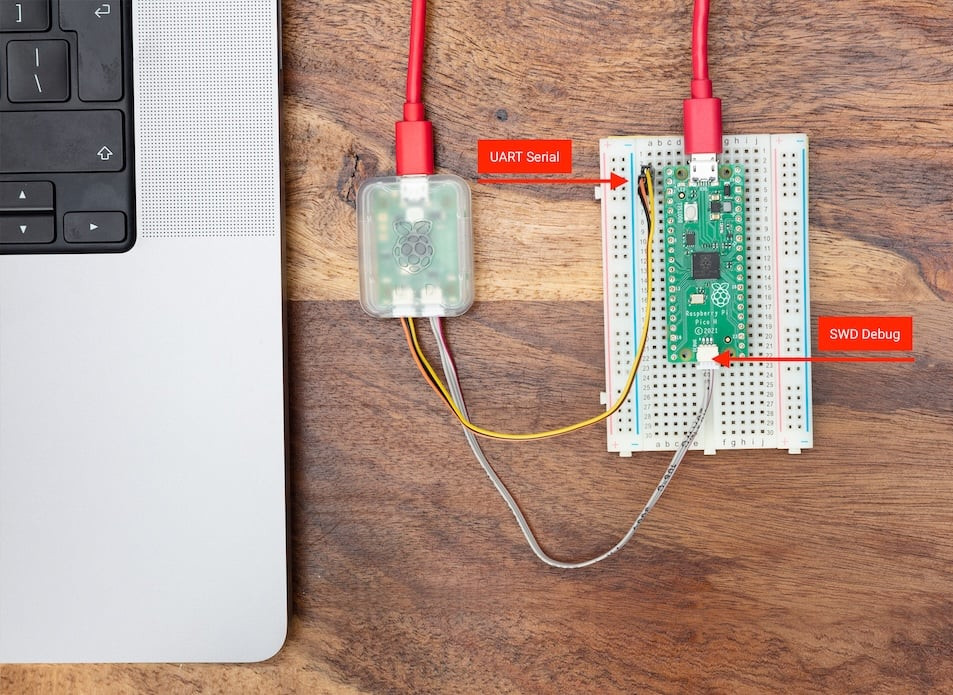
Want to learn Embedded Rust but not sure where to begin? In this post, I will show you how to get started with Embedded Rust and share tutorials, books, videos, and other useful resources you can learn from. As a beginner, you might wonder where to start with Embedded Rust. I have been in the same place, and I have seen many others recently asking the same question. So I decided to write this blog post to help. In this guide, I will explain how to get started, what to focus on first, and share a list of useful resources including books, YouTube videos, and other material you can learn from. Where you should begin depends on your background. If you are an absolute beginner to embedded programming itself, your learning path will be different from someone who already understands embedded development and only wants to learn Embedded Rust. Even within those groups, goals can vary, such as learning for a hobby or for professional work. I’ll do my best to address a broad audience while covering the most common scenarios. If you already have embedded experience, you can jump straight into the official “The Embedded Rust Book” to learn Rust-specific concepts. After that, check out the “Embassy book” for async embedded development. From there, explore the examples in the Hardware Abstraction Layer (HAL) for your specific chip. The Embedded Rust ecosystem has excellent HAL documentation and examples to help you get productive quickly. The remaining sections focus on resources for embedded programming beginners. Before learning Embedded Rust, make sure you are comfortable with these basics: If you’re completely new to Rust, start with the official Rust Book first. Understanding Rust’s ownership, borrowing, and type system is essential before tackling embedded development. Come back to this guide once you’re comfortable with basic Rust concepts. You’ll need a basic understanding of electronics concepts like voltage, current, resistance, and how components like LEDs and resistors work. There are plenty of free tutorials and YouTube videos covering electronics basics for beginners. You don’t need to be an expert, just understand the fundamentals. Now, the question is: What hardware should you get? But before answering that, let me briefly explain what microcontrollers and development boards are. A microcontroller is a small computer on a single chip that includes a processor, memory, and input/output peripherals. Unlike your laptop or phone, microcontrollers are designed to perform specific tasks efficiently with minimal power consumption. They’re found everywhere; in your washing machine, car, smart thermostat, and countless other devices. A development board (or “devboard”) is a circuit board that contains a microcontroller along with supporting components like voltage regulators, USB connectors, and pins that make it easy to connect sensors and other hardware. Development boards are designed to make prototyping and learning easier. You can start programming immediately without needing to design your own circuit. If you already have a board, great! You can start with that. Otherwise, let me give you a straightforward recommendation without overwhelming you with options. My recommendation: Get an ESP32 development board. Why? ESP32 boards are widely available, affordable, and include built-in WiFi and Bluetooth, which opens up many project possibilities. They have solid Embedded Rust support through the esp-rs project. Look for these boards - they all use the original ESP32 chip: “ESP32 DevKit V1” - This is my top recommendation because my open-source book is based on this board, making it easy to follow along with tutorials and examples. “ESP32 DevKit C” Any board using the original ESP32 chip should be fine. There might be slight differences in pin layout and labeling, but the code and core features remain the same. Important: ESP32 comes in different variants (original ESP32, ESP32-S2, ESP32-S3, ESP32-C3, ESP32-C6, etc.). I’m recommending the original ESP32 (also called ESP32-WROOM or ESP32-WROOM-32). Make sure you’re getting a plain “ESP32” board, not the S-series or C-series variants, as those are different chips with different architectures. Alternative option: Raspberry Pi Pico 2 If you can’t find an ESP32 board where you live, the Raspberry Pi Pico 2 (with RP2350 chip) is an excellent alternative.. The main tradeoff is it lacks WiFi and Bluetooth, but it’s perfect for learning embedded fundamentals. There’s also a Pico 2 W variant that supports WiFi and Bluetooth, though you may need to adjust the code slightly when following tutorials with it. Let me share my journey learning Embedded Rust as a beginner, which will help explain my recommendation. My First Board: micro:bit v2 The micro:bit was my first device. I chose it because the official Embedded Rust book had examples for it, so I thought I’d just buy one and follow along. The micro:bit is a nice board with built-in features like a microphone, speaker, and LED matrix, which are great for getting started quickly. However, I soon hit limitations. Connecting external components wasn’t straightforward. I needed an edge connector or expansion board to add sensors, buttons, or other peripherals. This added extra cost and complexity. The board itself was also expensive, costing about three times more than an ESP32 DevKit V1. My Second Board: Raspberry Pi Pico 2 Next, I bought a Raspberry Pi Pico 2 (with the RP2350 chip). It’s an excellent board, and I documented my learning in an open-source book called “Pico Pico” that I’m currently revising based on my experience. However, there is one thing I did not like: every time you want to run your new program on the board, you must press a button and reconnect the USB cable. And if you make changes again, you need to unplug and repeat the same steps. This becomes tiring very quickly. This problem can be solved with a debug probe, a separate piece of hardware. With a debug probe. With a debug probe, you can write and debug your code seamlessly without unplugging anything. However, buying a board plus a debug probe brings the total cost to about three times that of an ESP32 DevKit V1. But, the advantage is that you get proper debugging capabilities that work across different boards, but it’s an extra expense that’s not strictly necessary when you’re just starting out on a tight budget. My Third Board: ESP32 DevKit V1 Then I discovered the ESP32 DevKit V1, and everything changed. This board is a beast in terms of what it offers for the price. Here’s why it became my top recommendation: Even other ESP32 series often cost more or lack either WiFi or Bluetooth. The ESP32 on the DevKit V1 gives you the best bang for your buck. The Bottom Line If you’re just starting out and want the most flexibility at the lowest cost, get an ESP32 DevKit V1. You can build real projects with WiFi and Bluetooth connectivity without spending extra on debug probes or expansion boards. Apart from the development board, you’ll need some additional electronic components. Some are essentials like breadboards, jumper wires, and resistors. Others are optional, like LEDs (well, maybe not so optional!), various sensors, and other components. You can buy these as you progress through your learning journey. Wow, I didn’t expect to write this much about hardware itself! Now that we’ve decided on which development board to buy, let’s focus on how to use it and where to go from here. I’ll be recommending only open source and free resources, which should be more than enough to get you started. Regardless of which board you choose, the first book I recommend is the official book by the Embedded Rust Working Group. This will introduce you to the basic concepts of embedded Rust development. Embassy is an async framework for embedded Rust. You can start learning it from the official Embassy Book. It explains how async works on microcontrollers and shows a few examples. This is one of my favorite channels for learning Embedded Rust. The creator explains concepts very clearly with helpful videos like “From Zero to Async in Embedded Rust”. https://www.youtube.com/@therustybits/videos The next resource is the official “The Rust on ESP Book”. This book covers ESP32 and its variants, showing you how to set up your development tools and explaining the basic concepts of the ESP embedded Rust ecosystem. Next up is the book I wrote called “impl Rust for ESP32”. This is an open source book that uses the ESP32 DevKit V1 with Rust to build simple and fun projects. You’ll explore hands-on examples like turning on an LED when the room gets darker using an LDR sensor, using an ultrasonic sensor to detect nearby objects, controlling an LED through WiFi, drawing images and text on an OLED display, playing songs and alarm sounds with a buzzer, controlling a servo motor, running a web server and more. Once you understand the basics, you can explore the examples section of the HAL (Hardware Abstraction Layer) or other crates you’ll be using. The esp-hal repository has a nice set of examples: https://github.com/esp-rs/esp-hal/tree/main/examples If you bought the Pico 2 (RP2350 chip) or if you “have” the older Pico version (RP2040), you can follow this learning path. As I mentioned earlier, I wrote a book for the Raspberry Pi Pico 2 also. You can read it here. This is an open source book that uses the Pico 2 with Rust to build simple and fun projects. Like the ESP32 book, this also includes similar hands-on examples with various sensors and components. Once you understand the basics, you can explore the examples in the rp-hal repository. It has a good collection of examples for the Raspberry Pi Pico: For Raspberry Pi Pico 2 (RP2350): https://github.com/rp-rs/rp-hal/tree/main/rp235x-hal-examples For Raspberry Pi Pico (RP2040): https://github.com/rp-rs/rp-hal/tree/main/rp2040-hal-examples If you bought a micro:bit v2 board and want to learn Embedded Rust with it, these resources will help you. This book, written by the official Embedded Rust Working Group, teaches embedded Rust using the BBC micro:bit v2. It is an introductory course that helps you learn how microcontrollers work and how to write embedded Rust code for them. You can read it online here: This is an open source book that teaches Embedded Rust on the BBC micro:bit v2 with hands-on, simple projects. It builds practical skills by walking through examples like controlling LEDs, reading sensors, and interacting with buttons and displays. The book is beginner friendly and focuses on learning by doing. You can read it online here: Here are some other useful resources related to Embedded Rust. This is a curated list of resources for embedded and low-level programming in Rust. It includes useful crates, tools, books, tutorials, and more. https://github.com/rust-embedded/awesome-embedded-rust You might wonder what writing an OS has to do with embedded Rust. In many embedded systems, there is no underlying OS at all. Your firmware is the only thing running on the device. This series gives a great introduction to low-level concepts that are also useful in embedded development. You will not be writing a full operating system, but you will learn many fundamentals. I have also written an open source book that focuses on building drivers in Embedded Rust. This book is slightly more advanced than my board-specific books, so it is best explored after completing the introductory material. It offers step-by-step guidance on writing drivers from the ground up for components such as the DHT22 sensor, the MAX7219 LED display (including an embedded-graphics implementation), RTC modules, and a platform-agnostic RTC HAL to illustrate the embedded-hal concept. Wokwi is an online simulator for embedded projects. It lets you write code, connect virtual components, and test circuits in the browser. It supports boards like Arduino, ESP32, and Raspberry Pi Pico, and it also supports running Embedded Rust projects. It is a quick way to experiment, learn, and verify ideas without using real hardware. You can run simulations directly in the browser or through the Wokwi for VS Code extension. In my experience, the Rust simulator on the website can be unreliable, while the VS Code extension works more consistently. However, nothing fully replaces having fun with real hardware.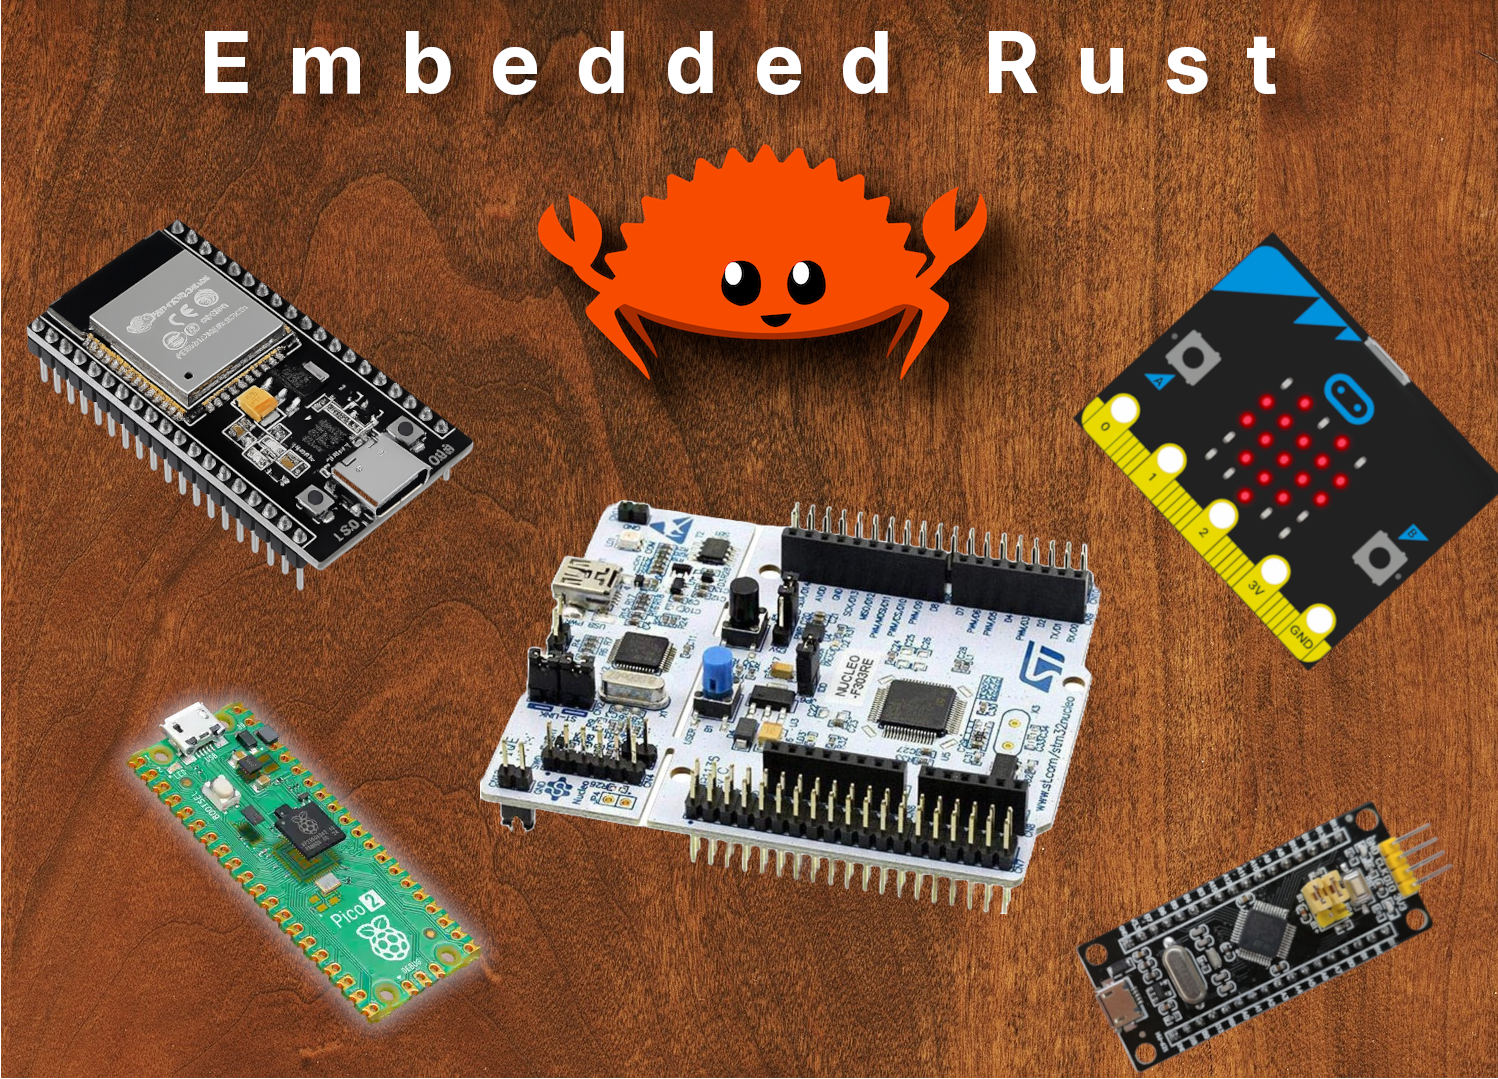
Table of Contents
Are you new to embedded programming or just to Embedded Rust?
If you already have embedded programming experience
Prerequisites
Rust basics
Electronics Fundamentals
Hardware to Get Started
What are Microcontrollers and Development Boards?
Which Board Should You Get?


But, Why ESP32 DevKit V1?
Additional Components
Embedded Rust Basics
The Embedded Rust book
Embassy Book
Rustybits Youtube channel
Learning Path for ESP32
The Rust on ESP Book
impl Rust for ESP32 Book
Examples
Learning Path for Raspberry Pi Pico 2
Pico Pico Book
Examples
Learning Path for Microbit:v2
micro::bit v2 Embedded Discovery Book
https://docs.rust-embedded.org/discovery-mb2/index.html impl Rust for Microbit
https://mb2.implrust.com/ Other Resources
Curated List - Awesome Embedded Rust
Writing an OS in Rust
Rust Embedded Driver (RED) Book
Wokwi Platform